×
- Live Chat
- 1-888-788-9341


My Garage
My Account
Cart
Genuine Ford Taurus Automatic Transmission Shift Levers
Automatic Transmission Shifter- Select Vehicle by Model
- Select Vehicle by VIN
Select Vehicle by Model
orMake
Model
Year
Select Vehicle by VIN
For the most accurate results, select vehicle by your VIN (Vehicle Identification Number).
41 Automatic Transmission Shift Levers found
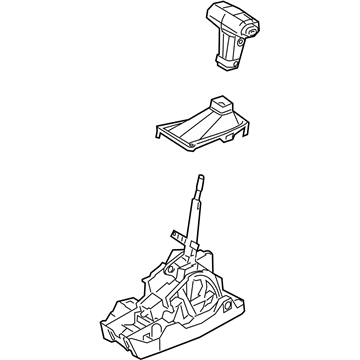
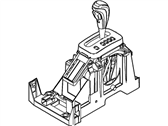
Ford Taurus Lever - Gear Shift
Part Number: AG1Z-7210-CE$316.40 MSRP: $466.67You Save: $150.27 (33%)Ships in 1-2 Business DaysFord Taurus Lever - Gear Shift
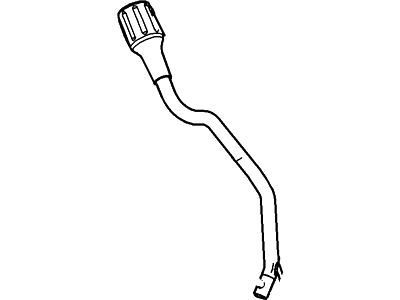
Part Number: AG1Z-7210-CB$316.40 MSRP: $466.67You Save: $150.27 (33%)Ships in 1-2 Business DaysFord Taurus Lever - Transmission Gear Shift
Part Number: DG1Z-7210-B$76.49 MSRP: $111.83You Save: $35.34 (32%)Ships in 1-3 Business DaysFord Taurus Lever
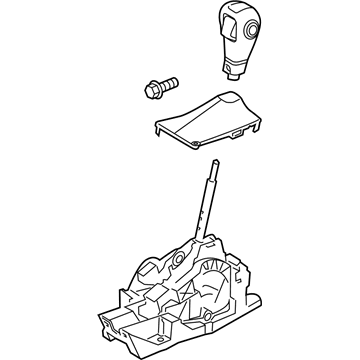
Part Number: DG1Z-7A256-B$88.01 MSRP: $128.67You Save: $40.66 (32%)Ships in 1-3 Business DaysFord Taurus Lever - Gear Shift
Part Number: AG1Z-7210-CF$392.11 MSRP: $578.33You Save: $186.22 (33%)Ships in 1-3 Business DaysFord Taurus Lever - Gear Shift
Part Number: AG1Z-7210-AD$353.69 MSRP: $521.67You Save: $167.98 (33%)Ships in 1-3 Business DaysFord Taurus Lever - Gear Shift
Part Number: DG1Z-7210-CA$175.56 MSRP: $256.67You Save: $81.11 (32%)Ships in 1-3 Business DaysFord Taurus Lever - Gear Shift
Part Number: 4F1Z-7210-AA$10.90 MSRP: $15.14You Save: $4.24 (29%)Ships in 1-2 Business DaysFord Taurus Lever - Gear Shift
Part Number: 2F1Z-7210-AA$22.12 MSRP: $30.72You Save: $8.60 (28%)Ships in 1-2 Business DaysFord Taurus Lever - Gear Shift
Part Number: AG1Z-7210-CD$392.11 MSRP: $578.33You Save: $186.22 (33%)Ships in 1-3 Business DaysFord Taurus Lever - Gear Shift
Part Number: DG1Z-7210-BA$153.90 MSRP: $225.00You Save: $71.10 (32%)Ships in 1-3 Business DaysFord Taurus Lever - Gear Shift
Part Number: DG1Z-7210-BB$153.90 MSRP: $225.00You Save: $71.10 (32%)Ships in 1-3 Business DaysFord Taurus Lever - Gear Shift
Part Number: DG1Z-7210-BC$153.90 MSRP: $225.00You Save: $71.10 (32%)Ships in 1-3 Business DaysFord Taurus Lever - Gear Shift
Part Number: DG1Z-7210-EA$161.88 MSRP: $236.67You Save: $74.79 (32%)Ships in 1-3 Business DaysFord Taurus Lever - Gear Shift
Part Number: DG1Z-7210-DA$171.00 MSRP: $250.00You Save: $79.00 (32%)Ships in 1-2 Business DaysFord Taurus Lever - Gear Shift
Part Number: DG1Z-7210-AA$181.26 MSRP: $265.00You Save: $83.74 (32%)Ships in 1-3 Business DaysFord Taurus Lever - Gear Shift
Part Number: 5F1Z-7210-C$46.88 MSRP: $65.13You Save: $18.25 (29%)Ships in 1-2 Business Days
| Page 1 of 3 |Next >
1-20 of 41 Results
Ford Taurus Automatic Transmission Shift Levers
We provide a wide range of Ford Taurus Automatic Transmission Shift Levers at the best prices possible. If you need Ford Taurus Automatic Transmission Shift Levers, you can shop with confidence on our website. All our OEM parts come with a manufacturer's warranty and are delivered to your door step with a fast delivery service.
Ford Taurus Automatic Transmission Shift Levers Parts Questions & Experts Answers
- Q: How to remove and install the floor shifter, shift lever assembly, and paddle shifter on Ford Taurus?A: For 2007 and earlier models, begin by moving the shift knob lower bezel down and removing the screw at the front of the shift knob, then lift upward to remove the knob, with installation being the reverse of removal. For models from 2008 to 2012, first remove the upper bezel around the shifter, disconnect the TCS electrical connector if equipped, slide the shift knob lower cover down to access and remove the two screws, and then pull out the knob while detaching the TCS harness, with installation reversing the removal steps. For 2013 and later models, remove the upper shift lever bezel, pull up the shift knob boot to disconnect the electrical connector, remove the two screws, and pull the knob off the shaft, with installation reversing the removal process. To access the shift lever assembly, disconnect the cable from the negative battery terminal and wait two minutes, then remove the floor console and center trim covers as needed, use a trim tool to pry the cable end from the ballstud, release the tabs on the Shift Cable to detach it from the console, disconnect the electrical connector and wire harness clips, remove the carpet retainers, and take out the four shifter base bolts to remove the shift lever assembly, with installation being the reverse of removal. Check the shift cable adjustment and ensure the vehicle starts in Park and Neutral, with back-up lights illuminating in Reverse. For the column shifter, remove the upper and lower steering column covers, disconnect the shift lever connector and harness clip, remove the shift lever screw, and take out the shift lever while being careful with the harness, with installation reversing the removal steps. After removing the shift lever, detach the shift interlock cable and shift cable from the assembly, remove the mounting bolts, and take out the shift lever assembly, with installation being the reverse of removal. Again, check the shift cable adjustment to ensure the vehicle starts only in Park and Neutral, and that back-up lights activate in Reverse. For the paddle shifter, disconnect the cable from the negative battery terminal and wait two minutes, remove the airbag module from the steering wheel, take out the steering wheel switch trim panel screws, disconnect the electrical connectors from the switch trim panel, remove the trim panel, disconnect the electrical connectors from the paddle shifter, and remove the two mounting screws to take out the paddle shifter, with installation being the reverse of removal.
Related Ford Taurus Parts
Browse by Year
2019 Automatic Transmission Shift Levers 2018 Automatic Transmission Shift Levers 2017 Automatic Transmission Shift Levers 2016 Automatic Transmission Shift Levers 2015 Automatic Transmission Shift Levers 2014 Automatic Transmission Shift Levers 2013 Automatic Transmission Shift Levers 2012 Automatic Transmission Shift Levers 2011 Automatic Transmission Shift Levers 2010 Automatic Transmission Shift Levers 2009 Automatic Transmission Shift Levers 2008 Automatic Transmission Shift Levers 2007 Automatic Transmission Shift Levers 2006 Automatic Transmission Shift Levers 2005 Automatic Transmission Shift Levers 2004 Automatic Transmission Shift Levers 2003 Automatic Transmission Shift Levers 2002 Automatic Transmission Shift Levers 2001 Automatic Transmission Shift Levers 2000 Automatic Transmission Shift Levers 1999 Automatic Transmission Shift Levers 1997 Automatic Transmission Shift Levers 1996 Automatic Transmission Shift Levers
