
Why choose FordPartsGiant
- Devoted Service
At FordPartsGiant.com, we strive to make customer satisfaction our #1 goal by providing dedicated customer service. Our core values of success continue to demonstrate our loyalty by building dedicated relationships with all of our current and future customers. We are always ready to assist you with the slightest detail about your vehicle's parts and accessories.
- Reasonable Prices
We are the best online source for discounted prices on factory auto parts and accessories. Not everyone has the money to buy their vehicle quality parts, here at FordPartsGiant.com we make it economical to buy the best parts without sacrificing the quality or hurting your wallet.
- Swift Delivery
FordPartsGiant.com has centrally located distribution centers all across the United States. This gives you quick access to our discounted Ford Taurus parts when you need them. We offer our customers the convenience of having parts delivered straight to their front door. We are committed to having your vehicle up and running in just a couple of days.
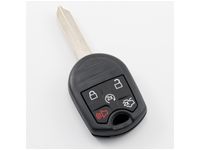
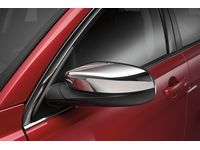
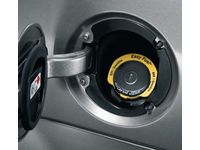
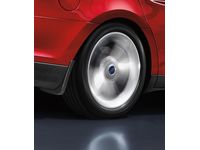
Popular Genuine Ford Taurus Parts
- Engine Parts View More >
- Chassis Parts View More >
- Electrical Parts View More >
- Body And Paint Parts View More >
- Lamps & Wiring Parts View More >
- Wheels & Brakes Parts View More >
- Fuel System & Manifolds Parts View More >
- Speedometer, Bumpers, Mirrors & Wipers Parts View More >
- Transmission Parts View More >


Shop Genuine Ford Taurus Parts with FordPartsGiant.com
The Ford Taurus, manufactured by the Ford Motor Company, is a vehicle that revolutionized the American auto industry. First introduced in 1985 and consulted on by renowned statistician W. Edwards Deming, it played a crucial role in fostering a culture of quality at Ford. Initially an FWD mid-size car based on the DN5 chassis, it transitioned to a full-size model based on the Volvo D3 chassis in 2007, offering both front- and all-wheel drive. It was predominantly produced as a four-door sedan, with a five-door station wagon variant available until 2005. The Taurus's significance is its position between the compact Focus and the larger Ford Taurus in Ford's lineup, and it's available in the Middle East alongside the Mondeo, equipped with a 2.5L engine. The new Taurus, built on Mazda's G-platform (CD3), was the first to feature a new triangular "face grille" and also borrowed Mazda's I4 engine and two 5-speed transmissions. The second-generation Fusion, launched in 2013 and based on the CD4 platform, introduced the "One Ford" global strategy. It offered five powertrains, including two hybrid options, all four-cylinder, signaling a move away from the previous model's V6. A plug-in hybrid variant was also part of the lineup in 2017. Despite plans for a Taurus GT with a 3.5L Eco Boost V6 engine, this model was never seen. Key standard features include front-seat side airbags, airbags, and an alarm system, with Sirius satellite radio as an option on SE and SEL models.
Like any other vehicle, the Ford Taurus starts showing signs of wear and tear after prolonged use, with the most common issues related to the suspension system and engine. Experienced drivers have reported that the Taurus might start tilting to one side, bouncing while driving, and even bottoming out, accompanied by uneven tire wear and a sagging, bouncy suspension. In such cases, it's advisable to thoroughly inspect the coil springs and air suspension. Engine problems, on the other hand, can severely impact the vehicle's performance, leading to slow acceleration, engine misfires, poor fuel economy, rough running, and difficulty in starting. These issues are often signaled by low engine oil, a burnt oil smell, a dirty valve cover, and the illumination of the Check Engine Light, suggesting that components like the fuel injector, valve cover gasket, and spark plug might need replacement. The headlight, though small, is vital for safe driving, providing clear vision of the road ahead and acting as a warning signal for other drivers and pedestrians. It's prone to wear and tear and should be replaced regularly to ensure safety.
For those Ford owners who aspire to maintain their vehicles in optimal shape, opting for OEM parts is a wise choice. Precisely engineered, these components adhere to stringent factory guidelines and are produced in state-of-the-art facilities using cutting-edge technologies. Moreover, they are subjected to thorough testing to certify their resilience and safety, thereby making them a dependable option for Ford owners. Obtaining Ford Taurus parts from our website would be your wisest choice. We carry a huge selection of genuine Ford Taurus parts at unbelievably economical prices. You would save a lot of trouble and money as all OEM parts are backed by the manufacturer's warranty.
Ford Taurus Parts Questions & Answers
- Q: How to remove and install the front Sway Bar Kit and Sway Bar Bushing on a Ford Taurus?A: The Sway Bar Bushing and brackets that hold up the Sway Bar Kit are now integrated with this bar and cannot be replaced on models made since 2008. First, put your car in Neutral. Unplug the mass air connector from the rear side of the undercarriage support and take off its power and data link. When your vehicle has all-wheel drive, take off both the Y-pipe on the exhaust and the front catalytic converter. Take out the lower nut from the stabilizer link, but avoid using power tools to do so. Take the steering knuckle ties off and disconnect the control arms from their holding place. Set a jack under the center of the subframe to keep it from falling when you take it out. Take out the power steering bolt joining the steering bracket to the return hose. Move the hose to one side while you work. While supporting the steering gear from above, detach its nuts and bolts before putting a rope or wire in place. Loosen the four subframe bracket bolts and two rear subframe bolts. Lower the subframe by about two inches. Disconnect the bracket holdng bolts on the left and right side of the stabilizer bar. Pull the bar towards the vehicle's right as you slide it through the space between the subframe and steering mechanism. When putting back the steering gear, we tighten all threaded components with fresh hardware and ensure all fittings reach their required tightening torque.
- Q: How to disconnect the brake light switch on Ford Taurus?A: To disconnect the brake light switch, follow these steps. Begin by disconnecting the electrical connector at the switch. Then, rotate the switch to remove it. With the brake pedal in the at-rest position, lightly pull it and rotate the switch clockwise to remove it. To install, follow these steps. Place the switch into the bracket. Please insert the connector of the switch. Remember not to press on the brake pedal during installation.
- Q: How to remove and install a front Coil Springs and Shock Absorber on a Ford Taurus?A: For 2012 and prior models, unlock steering and loosen strut upper mounting nuts in the engine compartment. Raise the vehicle, remove the wheel, depress brake pedal, and remove the driveaxle/hub nut. Remove brake disc, separate tie-rod end and stabilizer bar from knuckle. Detach sensor harness, press driveaxle from hub, and remove the strut assembly. Inspect shock and spring for damage. For installation, align knuckle onto strut, insert upper studs through body holes, and guide driveaxle into wheel hub. Reconnect control arm balljoint, sensor harness, stabilizer bar, and tie-rod end. Install brake discs, new hub nut, and wheel. Check front end alignment. For 2013 models onwards, mark strut stud in engine compartment and loosen mounting nuts. Raise the vehicle, remove wheel, and detach sensor harness. Support control arm with jack, unscrew nuts securing strut to knuckle, and remove strut assembly. Inspect as before. For installation, align strut into fender well, insert studs through body holes, use jack to position knuckle, reconnect wheel speed sensor harness, and install wheel. Tighten nuts to correct torque, lower vehicle, and check alignment.


