×
- Live Chat
- 1-888-788-9341


My Garage
My Account
Cart
Genuine Ford Taurus Shock Absorber
Suspension Shock Absorber- Select Vehicle by Model
- Select Vehicle by VIN
Select Vehicle by Model
orMake
Model
Year
Select Vehicle by VIN
For the most accurate results, select vehicle by your VIN (Vehicle Identification Number).
98 Shock Absorbers found
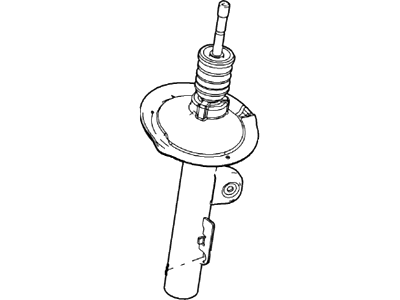
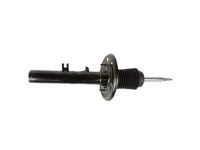
Ford Taurus Shock Absorber Assembly
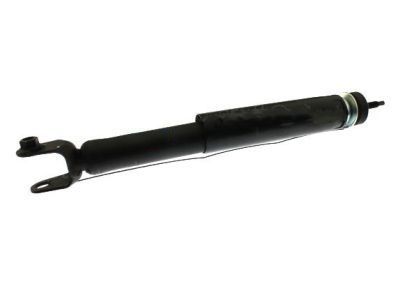
Part Number: AG1Z-18125-A$102.08 MSRP: $168.73You Save: $66.65 (40%)Ships in 1-2 Business DaysFord Taurus Shock Absorber Assembly
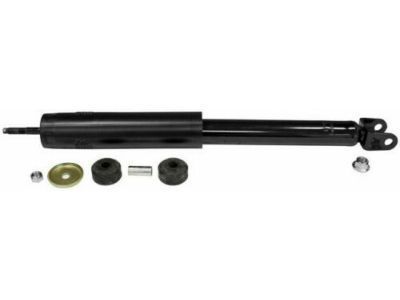
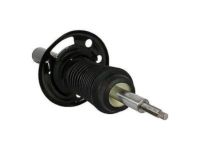
Part Number: AG1Z-18125-D$102.08 MSRP: $168.73You Save: $66.65 (40%)Ships in 1-2 Business DaysFord Taurus Shock Absorber Assembly
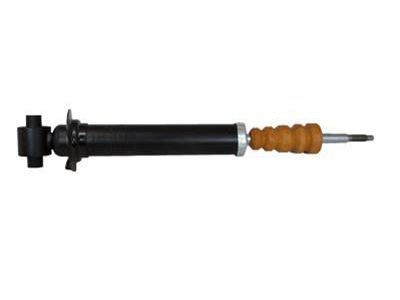
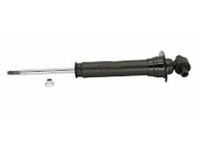
Part Number: 8G1Z-18125-H$83.87 MSRP: $141.45You Save: $57.58 (41%)Ships in 1-2 Business DaysFord Taurus Shock Absorber Assembly - Front
Part Number: 3F1Z-18124-CA$77.72 MSRP: $131.09You Save: $53.37 (41%)Ford Taurus Shock Absorber Assembly
Part Number: CG1Z-18125-A$102.08 MSRP: $168.73You Save: $66.65 (40%)Ships in 1-2 Business DaysFord Taurus Shock Absorber Assembly - Front
Part Number: 8G1Z-18124-C$62.22 MSRP: $85.02You Save: $22.80 (27%)Ford Taurus Kit - Shock Absorber
Part Number: 5U2Z-18V125-FA$31.19 MSRP: $43.33You Save: $12.14 (29%)Ships in 1-2 Business DaysFord Taurus Kit - Shock Absorber
Part Number: XF1Z-18125-BA$37.39 MSRP: $51.09You Save: $13.70 (27%)Ships in 1-2 Business DaysFord Taurus Kit - Front Suspension Strut
Part Number: 5U2Z-18V124-HA$44.16 MSRP: $60.35You Save: $16.19 (27%)Ford Taurus Shock Absorber Assembly
Part Number: 4F1Z-18124-AC$108.88 MSRP: $183.64You Save: $74.76 (41%)Ford Taurus Shock Absorber Assembly
Part Number: 3F1Z-18124-CB$107.57 MSRP: $183.64You Save: $76.07 (42%)Ships in 1-2 Business DaysFord Taurus Shock Absorber Assembly
Part Number: CG1Z-18125-B$102.08 MSRP: $168.73You Save: $66.65 (40%)Ships in 1-2 Business DaysFord Taurus Shock Absorber Assembly
Part Number: CG1Z-18125-C$102.08 MSRP: $168.73You Save: $66.65 (40%)Ships in 1-2 Business DaysFord Taurus Kit - Front Suspension Strut
Part Number: 5U2Z-18V124-UA$48.30 MSRP: $66.00You Save: $17.70 (27%)Ford Taurus Shock Absorber Assy - Front
Part Number: 8G1Z-18124-LA$62.22 MSRP: $85.02You Save: $22.80 (27%)Ford Taurus Shock Absorber Assembly
Part Number: AG1Z-18125-C$102.08 MSRP: $168.73You Save: $66.65 (40%)Ships in 1-2 Business DaysFord Taurus Shock Absorber Assembly
Part Number: CG1Z-18125-D$102.08 MSRP: $168.73You Save: $66.65 (40%)Ships in 1-2 Business Days
| Page 1 of 5 |Next >
1-20 of 98 Results
Ford Taurus Shock Absorber
The role of the Shock Absorber is to accumulate and minimize compression waves to enhance the stability of the cars on roads of Ford Taurus. These hydraulic gadgets that are usually used together with springs translate kinetic energy into heat in order to absorb and restrain the surfeit of suspension motions, vibrations. The Taurus models over the years have incorporated different kinds of Shock Absorber systems, which include the twin-tube system, and the mono-tube system, where there is different methods that are allowed in the regular movement of the hydraulic fluids so that optimal performance can be obtained based on the different conditions involved. PSD and ASD enhance the Shock Absorber's ability to respond to specific form of driving; electrorheological, magnetorheological provides a semi-active suspension system that enables to achieve the optimal comfort and control.
We provide a wide range of Ford Taurus Shock Absorber at the best prices possible. If you need Ford Taurus Shock Absorber, you can shop with confidence on our website. All our OEM parts come with a manufacturer's warranty and are delivered to your door step with a fast delivery service.
Ford Taurus Shock Absorber Parts Questions & Experts Answers
- Q: How to install new rear shock absorbers on Ford Taurus?A: For 2012 and earlier models, new shock absorbers are gas-filled, compressed, and retained with a strap. Don't remove the strap until installation. Measure wheel hub to fender distance at rest. Remove rear wheel, loosen the brake caliper and mounting bracket, and support the lower suspension arm. Remove upper shock absorber mounting nut, index spring position, compress coil spring with a floor jack, remove trailing arm-to-rear knuckle bolt, and lower arm-to-rear knuckle bolt. Lower the jack and remove shock absorber and coil spring. Align new components with match marks. Raise the suspension arm to simulate ride height, tighten fasteners, install the wheel, and lower the vehicle. For 2013 and later models, remove the rear wheel, detach the stabilizer bar link from the rear knuckle, support the lower suspension arm, remove the shock absorber upper mounting nut and lower mounting bolt. Installation is reverse of removal, using new fasteners. Raise the lower suspension arm to simulate ride height, tighten fasteners, install the wheel, and lower the vehicle.
- Q: How to disassemble and overhaul the front suspension shock absorber/coil springs on Ford Taurus?A: If the front suspension shock absorber/coil springs show signs of wear such as leaking fluid, loss of damping capability, sagging or cracked coil springs, they should be disassembled and overhauled as needed. The shock absorbers cannot be serviced and should be replaced if faulty, while the springs and related components can be replaced individually. It is important to replace components on both sides of the vehicle simultaneously to maintain balanced characteristics. Once the assembly is removed from the vehicle, clean off any external dirt without damaging the protective coating on the spring. Install the coil spring compressor tools securely and compress the spring until all tension is relieved from the upper mount. Hold the shock absorber piston rod with a wrench and unscrew the nut, avoiding the use of an impact wrench to prevent damage. Remove the upper mount, spring, boot, bump stop, and lower spring seat. If a new spring is being installed, carefully release the original spring from the compressor. Examine all components for wear and damage, replacing as necessary. Check the shock for fluid leakage, pitting on the piston rod, and damage to the shock body. Test the shock's operation by moving the piston through full and short strokes, ensuring smooth and continuous resistance. Reassemble by installing the lower spring seat, bump stop, and dust boot onto the shock absorber. Then, install the spring and upper mount/upper seat, aligning the arrow or notch on the upper mount with the lower mount. With the spring compressed, install the rod nut and position the ends of the spring within 0.39-inch of the step on both mounts. Tighten the nut to the specified torque while maintaining the position at both ends. Release the tension on the spring and reinstall the spring assembly in the vehicle.
- Q: How do I check the shock absorber and CV Boot on Ford Taurus?A: To check the shock absorber, the vehicle must be parked on an even ground and then engine turned off; parking brake should also be set while tire pressures are checked. Push down on each corner of the vehicle and release; watch its movement for it to settle back after one or two bounces then rest in a level position; if it keeps moving more than that, old or weak shock absorbers might be responsible. This test is repeated for every corner of the car. Raise and safely support the vehicle with jack stands before examining all shocks for fluid leakage so as to see if the fluid is from there or some other source. If there is a leak you can replace them. Also, confirm that they are solidly mounted and without damage by checking wear or damage in their upper mounts and if necessary, change them as a group. Start by looking at tire wear patterns and inflation pressure to get an overall picture of steering and suspension health. Check for oil seepage between steering shaft universal joint and steering gear housing, confirming intact dust boots and secure boot clamps. Play in tie-rod ends needs to be checked while all suspension parts have their bolts secured alongside any broken connectors or dislodged parts as well as spoilt rubber bushes throughout both systems where needed. Check all steering components during an assistant's turn of the steering wheel for smoothness, rubbing, binding; mark areas with considerable slackness here. To check balljoint wear attempt prying up control arms alternatively followed by replacing any worn-out ball joints found this way. Test such boots for damages plus loss of grease therein as well as worn-out ball-joints which ought to be replaced any time they are detected here using a prybar moving up & down each control arm; inspect balljoint boots for damage particularly cracks & leaking grease inside cv-joint covers at rear end suspension arm bushings inspection cv-boot check know that these boots protect cv-joints thus they should be washed with water & soap, so that they can resist oil and grease attack. Ensure you inspect them for tears, cracks and loose clamps more especially the outer CV boot, anything wrong or leaking lubricant calls for an immediate replacement.
- Q: How to remove and install a front strut and Coil Springs on a Ford Taurus?A: For 2012 and prior models, unlock steering and loosen strut upper mounting nuts in the engine compartment. Raise the vehicle, remove the wheel, depress brake pedal, and remove the driveaxle/hub nut. Remove brake disc, separate tie-rod end and stabilizer bar from knuckle. Detach sensor harness, press driveaxle from hub, and remove the strut assembly. Inspect shock and spring for damage. For installation, align knuckle onto strut, insert upper studs through body holes, and guide driveaxle into wheel hub. Reconnect Control Arm balljoint, sensor harness, stabilizer bar, and tie-rod end. Install brake discs, new hub nut, and wheel. Check front end alignment. For 2013 models onwards, mark strut stud in engine compartment and loosen mounting nuts. Raise the vehicle, remove wheel, and detach sensor harness. Support control arm with jack, unscrew nuts securing strut to knuckle, and remove strut assembly. Inspect as before. For installation, align strut into fender well, insert studs through body holes, use jack to position knuckle, reconnect wheel speed sensor harness, and install wheel. Tighten nuts to correct torque, lower vehicle, and check alignment.
Related Ford Taurus Parts
Browse by Year
2019 Shock Absorber 2018 Shock Absorber 2017 Shock Absorber 2016 Shock Absorber 2015 Shock Absorber 2014 Shock Absorber 2013 Shock Absorber 2012 Shock Absorber 2011 Shock Absorber 2010 Shock Absorber 2009 Shock Absorber 2008 Shock Absorber 2007 Shock Absorber 2006 Shock Absorber 2005 Shock Absorber 2004 Shock Absorber 2003 Shock Absorber 2002 Shock Absorber 2001 Shock Absorber 2000 Shock Absorber 1999 Shock Absorber 1998 Shock Absorber 1997 Shock Absorber 1996 Shock Absorber 1995 Shock Absorber 1994 Shock Absorber 1993 Shock Absorber 1992 Shock Absorber 1991 Shock Absorber 1990 Shock Absorber 1989 Shock Absorber 1988 Shock Absorber 1987 Shock Absorber 1986 Shock Absorber
