×
- Live Chat
- 1-888-788-9341


My Garage
My Account
Cart
Genuine Ford Thunderbird Universal Joint
U-Joint- Select Vehicle by Model
- Select Vehicle by VIN
Select Vehicle by Model
orMake
Model
Year
Select Vehicle by VIN
For the most accurate results, select vehicle by your VIN (Vehicle Identification Number).
4 Universal Joints found
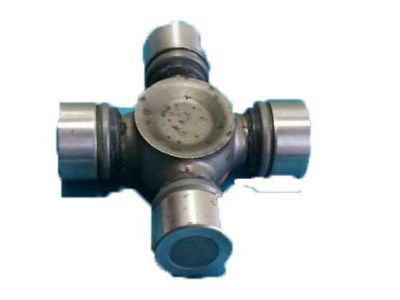
Ford Thunderbird U-Joint Repair Kit
Part Number: F2AZ-4635-C$31.01 MSRP: $44.17You Save: $13.16 (30%)Ships in 1-2 Business DaysFord Thunderbird U-Joint Repair Kit
Part Number: C3AZ-4635-L$10.62 MSRP: $14.75You Save: $4.13 (28%)Ships in 1-2 Business DaysFord Thunderbird U-Joint Repair Kit
Part Number: F2AZ-4635-A$34.88 MSRP: $51.00You Save: $16.12 (32%)Ships in 1-3 Business Days
Ford Thunderbird Universal Joint
In Ford Thunderbird vehicles the Universal Joint plays the of enabling the driveshaft to rotate as the power is transferred to the axle assembly when the car is in motion on the road, while allowing the suspension system to move as a result of the ground surface. Normally a cross with needle bearings in steel cups, U Joints are located at both ends of the driveshaft linking it to the transmission and differential. Although factory U Joints are supplied pre-lubricated, supplies those that have grease zerks with the opportunity to bolster their life through a refill of grease. symptoms of worn U Joints include the likes of noise such as clunks, vibrations and squeaking and when such defects exist, then they should be replaced. The development of the universal joint has been conditioned by numerous engineers over the course of history, and the role of the product has been defined in automotive as well as industrial spheres with the help of such brands as Hardy Spicer.
We provide a wide range of Ford Thunderbird Universal Joint at the best prices possible. If you need Ford Thunderbird Universal Joint, you can shop with confidence on our website. All our OEM parts come with a manufacturer's warranty and are delivered to your door step with a fast delivery service.
Ford Thunderbird Universal Joint Parts Questions & Experts Answers
- Q: How to replace universal joints in a driveshaft on Ford Thunderbird?A: A press or large vise will be required for this procedure. It may be advisable to take the driveshaft to a local dealer service department, service station or machine shop where the universal joints can be replaced for you, normally at a reasonable charge. Remove the driveshaft as outlined previously. Using a small pair of pliers, remove the snap-rings from the spider. A pair of needle-nose pliers can be used to remove the universal joint snap-rings. Supporting the driveshaft, place it in position on a workbench equipped with a vise. Place a piece of pipe or a large socket with the same inside diameter over one of the bearing caps. Position a socket which is of slightly smaller diameter than the cap on the opposite bearing cap. To press the universal joint out of the driveshaft yoke, set it up in a vise with the small socket pushing the joint and bearing cap into the large socket. Use the vise or press to force the cap out, stopping just before it comes completely out of the yoke. Use the vise or large pliers to work the cap the rest of the way out. Transfer the sockets to the other side and press the opposite bearing cap out in the same manner. Pack the new universal joint bearings with grease. Specific instructions for lubrication will be included with the universal joint servicing kit and should be followed carefully. Position the spider in the yoke and partially install one bearing cap in the yoke. Start the spider into the bearing cap and then partially install the other cap. Align the spider and press the bearing caps into position, being careful not to damage the dust seals. Install the snap-rings. If difficulty is encountered in seating the snap-rings, strike the driveshaft yoke sharply with a hammer. This will spring the yoke ears slightly and allow the snap-rings to seat in the groove. If the snap-ring will not seat in the groove, strike the yoke with a brass hammer - this will relieve the tension that has set up in the yoke, and slightly spring the yoke ears. This should also be done if the joint feels tight when assembled. Install the grease fitting and fill the joint with grease. Be careful not to overfill the joint, as this could blow out the grease seals. Install the driveshaft, tightening the companion flange bolts to the torque.
Related Ford Thunderbird Parts
Browse by Year
1997 Universal Joint 1996 Universal Joint 1995 Universal Joint 1994 Universal Joint 1993 Universal Joint 1992 Universal Joint 1991 Universal Joint 1990 Universal Joint 1989 Universal Joint 1988 Universal Joint 1987 Universal Joint 1986 Universal Joint 1985 Universal Joint 1984 Universal Joint 1983 Universal Joint 1982 Universal Joint 1981 Universal Joint 1980 Universal Joint


