
My Garage
My Account
Cart
Genuine Ford Bronco Universal Joint
U-Joint- Select Vehicle by Model
- Select Vehicle by VIN
Select Vehicle by Model
orMake
Model
Year
Select Vehicle by VIN
For the most accurate results, select vehicle by your VIN (Vehicle Identification Number).
10 Universal Joints found
Ford Bronco U-Joint Repair Kit
Part Number: F2TZ-4635-B$70.79 MSRP: $107.25You Save: $36.46 (34%)Ships in 1-3 Business DaysFord Bronco U-Joint Repair Kit
Part Number: F2TZ-4635-C$27.45 MSRP: $37.51You Save: $10.06 (27%)Ships in 1-2 Business DaysFord Bronco KIT - UNIVERSAL JOIN
Part Number: E3TZ4635B$18.29 MSRP: $24.99You Save: $6.70 (27%)Ships in 1-2 Business DaysFord Bronco U-Joint Repair Kit
Part Number: C3AZ-4635-M$18.37 MSRP: $25.11You Save: $6.74 (27%)Ships in 1-2 Business DaysFord Bronco U-Joint Repair Kit
Part Number: C3AZ-4635-L$10.62 MSRP: $14.75You Save: $4.13 (28%)Ships in 1-2 Business DaysFord Bronco U-Joint Repair Kit
Part Number: F3TZ-4635-A$24.17 MSRP: $35.33You Save: $11.16 (32%)Ships in 1-2 Business DaysFord Bronco U-Joint Repair Kit
Part Number: F2AZ-4635-A$42.13 MSRP: $61.60You Save: $19.47 (32%)Ships in 1-3 Business DaysFord Bronco U-Joint Repair Kit
Part Number: F2TZ-4635-E$25.08 MSRP: $36.67You Save: $11.59 (32%)Ships in 1 Business Day
Ford Bronco Universal Joint
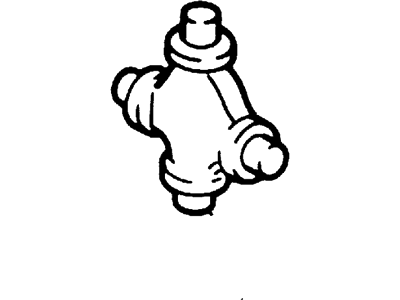
The Universal Joint in Ford Bronco cars play a significant part of linking the driveshaft to the differential so as to facilitate some amount of movement as the suspension system responds to demands of terrain. It is situated in such a way that the driveshaft is free to move in a pivoting nature in order to balanced changes in angle between parts. Generally, a Ford Bronco Universal Joint has a cross partisan needle bearing which is embedded in steel cups and is fastened by clips and often supplied with grease. In the Ford Bronco models, different styles of the Universal Joints have been used over the years together with differences in the lubrication. Original factory Universal Joints are normally pre-lubricated and generally come with a sealed design while options may come with a grease zerk for ease of lubrication. Worn Universal Joints can cause, amongst other things, noises such as clunking sounds and vibrations, which in order to be addressed and fix, require either inspection or replacement.
We provide a wide range of Ford Bronco Universal Joint at the best prices possible. If you need Ford Bronco Universal Joint, you can shop with confidence on our website. All our OEM parts come with a manufacturer's warranty and are delivered to your door step with a fast delivery service.
Ford Bronco Universal Joint Parts Questions & Experts Answers
- Q: How to repair different types of universal joints, including outer snap-ring, injected plastic, and double cardan type constant velocity joints on Ford Bronco?A:To service the outer snap-ring type universal joint, first, remove the driveshaft and mark the joint yokes' positions. Extract the snap-rings from the bearing cups, then use sockets or pipe pieces in a vise to press one cup while displacing the opposite one into a larger socket, gripping and twisting the bearing cup out with pliers. Clean the yoke and inspect for damage, then obtain a repair kit that includes trunnion, cups, needle rollers, seals, washers, and snap-rings. Before reassembly, pack grease into the trunnion reservoirs and needle bearings without displacing them. Position the trunnion in the yoke, partially install one cup, insert the trunnion, partially install the opposite cup, center the trunnion, and press both cups into place using sockets slightly smaller than the bearing cups, ensuring needle bearings remain in place. Install the snap-rings and align the shaft yokes to install the other bearing cups similarly. For the injected plastic type, destroy the production line plastic retainers and fit conventional snap-ring repair kits. Support the joint yoke in a press and use a forked tool to apply pressure to eject the bearing cups, then twist them out with a vise. Clean any plastic remnants and obtain a repair kit with a prelubricated trunnion assembly and other components. Assemble the joint, noting that snap-rings are installed inside the yokes, and if the joint is stiff after reassembly, apply hammer blows to free the bearing cups. For the double cardan type constant velocity joint, use an inspection kit to dismantle the joint for inspection, marking the flange and coupling yokes for reassembly. Disengage the flange yoke and trunnion from the centering ball, remove the seal, washers, spring, and ball seats, then clean and inspect all components for wear, replacing any damaged parts. Remove plastic from the coupling yoke groove if necessary, inspect and replace the centering ball if damaged, and press a new ball onto the stud. Lubricate all parts with grease from the repair kit and insert them into the ball seat cavity in the correct order, lubricate the seal lips, and press it into the cavity, filling it with grease. Finally, install the flange yoke to the centering ball, ensuring alignment marks are correct, and install the trunnion caps as previously described.
Related Ford Bronco Parts
Browse by Year
1996 Universal Joint 1995 Universal Joint 1994 Universal Joint 1993 Universal Joint 1992 Universal Joint 1989 Universal Joint 1988 Universal Joint 1987 Universal Joint 1986 Universal Joint 1985 Universal Joint 1984 Universal Joint 1983 Universal Joint 1982 Universal Joint 1981 Universal Joint 1980 Universal Joint


