×
- Live Chat
- 1-888-788-9341


My Garage
My Account
Cart
Genuine Ford Excursion A/C Accumulator
Accumulator- Select Vehicle by Model
- Select Vehicle by VIN
Select Vehicle by Model
orMake
Model
Year
Select Vehicle by VIN
For the most accurate results, select vehicle by your VIN (Vehicle Identification Number).
1 A/C Accumulator found
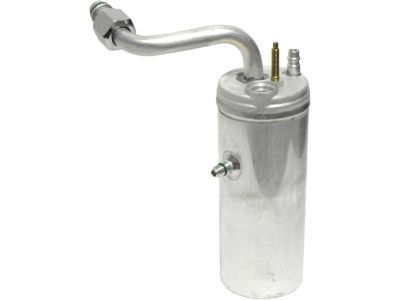
Ford Excursion Accumulator Assy - Air Conditioning
Part Number: 6C3Z-19C836-A$84.26 MSRP: $139.27You Save: $55.01 (40%)Ships in 1 Business Day
Ford Excursion A/C Accumulator
A/C Accumulation can be defined as a automotive tool used in the Ford Excursion vehicles and that is a very vital tool that is used in the cooling system. Sitting somewhere in between the evaporator and the compressor, this device in the form of a cylinder de-gasses the system by removing moisture, oil, and other unwanted particles. In this way the A/C Accumulator works effectively to expel the mentioned impurities thus contributing to the excellent performance of the A/C circuit of the vehicle. Over the years, Ford Excursion vehicles may have used different kinds or types of A/C Accumulators whereby all the kinds or types used served the same general purpose of providing for a clean and efficient system of cooling.
We provide a wide range of Ford Excursion A/C Accumulator at the best prices possible. If you need Ford Excursion A/C Accumulator, you can shop with confidence on our website. All our OEM parts come with a manufacturer's warranty and are delivered to your door step with a fast delivery service.
Ford Excursion A/C Accumulator Parts Questions & Experts Answers
- Q: How to remove and install the A/C Accumulator on Ford Excursion?A: Have the air conditioning system discharged. Disconnect the evaporator discharge line by putting a wrench on the fixed nut and loosening and unscrewing the other nut with another wrench. Use a back-up wrench to prevent the line from twisting. Cap the line to prevent contamination. Remove and discard the old O-ring. On vehicles equipped with an auxiliary air conditioning system, disconnect the auxiliary evaporator line. Remove and discard the old O-ring. Disconnect the manifold and tube assembly by removing the nut and unplugging the electrical connector from the pressure cycling switch. Loosen the accumulator mounting bracket bolt and then remove the accumulator. Cap the line to prevent contamination. Remove and discard the old O-ring. Disconnect the air conditioning pressure cycling switch electrical connector by removing the nut and unplugging the electrical connector from the pressure cycling switch. Loosen the accumulator mounting bracket bolt and then remove the accumulator. Remove the accumulator mounting bracket bolt and then remove the accumulator. Replace all old O-rings. Before installing the new O-rings, coat them with refrigerant oil. Installation is otherwise the reverse of removal. Take the vehicle to the shop that discharged it and have the system evacuated and recharged.


