Make sure this part fits

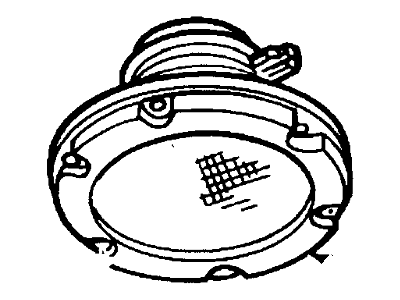
Mercury E9FZ-18808-A Speaker Assembly

1984-1990 Mercury E9FZ18808A

Customer Questions & Expert Answers (11)
Ford E9FZ-18808-A Speaker Assembly
  • Part Description
    SPEAKER ASY
  • Position
    Front
  • Replaced By
    XS4Z-18808-DA
  • Manufacturer
    Ford
  • Manufacturer's Notes
    This part is discontinued.
Make sure this part fits
  • Related Parts
  • Product Specifications
  • Vehicle Fitment
  • Customer Questions & Expert Answers
  • Product Specifications

    BrandGenuine Mercury
    Manufacturer Part NumberE9FZ-18808-A, E9FZ18808A
    Part DescriptionSPEAKER ASY
    Item Dimensions9.3 x 8.2 x 2.9 inches
    Item Weight1.20 Pounds
    PositionFront
    ConditionNew
    Fitment TypeDirect Replacement
    ManufacturerFord
    SKUE9FZ-18808-A
    WarrantyThis genuine Ford part is guaranteed by Ford's factory warranty.
    Shipping & ReturnShipping Policy Return Policy
    Warning: California’s Proposition 65
  • Vehicle Fitment

    Year Make Model Engine Important vehicle option details
    1990 Mercury Cougar6 Cyl 3.8L4AT AOD, 5MT
    1990 Mercury Grand Marquis8 Cyl 5.0L4AT AOD
    1984-1986 Mercury Lynx4 Cyl 1.6L, 4 Cyl 1.9L, 4 Cyl 2.0L3AT ATX, 4MT, 5MT
    1990, 1988, 1986 Mercury Sable4 Cyl 2.5L, 6 Cyl 3.0L, 6 Cyl 3.8L3AT ATX, 4AT AX4S, 4AT AXOD, 4AT AXOD-E
    1990, 1985-1988 Mercury Topaz4 Cyl 2.0L, 4 Cyl 2.3L3AT ATX, 4MT, 5MT
    1988-1989 Mercury Tracer4 Cyl 1.6L3AT ATX, 4MT, 5MT
  • Customer Questions & Expert Answers

    Q:
    I would like to know is this part gonna fit with my car Posted by FordPartsGiant Specialist
    A:
    You can Select Your Vehicle to check if E9FZ-18808-A fits your vehicle.
    Posted by FordPartsGiant Specialist
    Q:
    How to remove and install AM, AM/FM stereo radios, and speakers on Ford F-250? Posted by Customer
    A:
    To DO away with an AM or AM/FM stereo radio from early models, it is necessary to turn off the cable from the negative terminal of the battery, then to take away the knobs, discs and nuts fastened to radio control shafts in case they exist. Next, unbend the instrument panel bezel and delete the rear support bracket screw, if the exist. Pull the radio out of the instrument panel and remove the antenna cable, wire connector(s) and then proceed to remove the radio chassis from the mounting plate. For later models removal is easier but a special radio removal tools that can be obtained from a dealer or automotive radio shops. Remove the negative terminal of the battery, insert the radio puller on the left and right side of the instruction face plate, push the puller in to releases the radio plate clip and pull out the radio. Remove the wiring connectors and the antenna cable at the rear of the radio, if you are replacing it, transfer the rear mounting bracket to the new radio and connect the wiring connectors and the antenna cable. Put back the radio into the instrument panel slot, fasten the rear mounting bracket and connect the lead-negative battery terminal. For front speakers, to have access to them, the instrument panel pad has to be uninstalled, then the speaker wire connector has to be disconnected, the screws holding the speaker to the instrument panel have to be unscrewed and finally the speaker can be removed. For door speakers: unclip the door trim panel, then unscrew the speaker; pull the speaker out of the mounting recess and disconnect the electrical connection. For rear speakers, if not covered above then disconnect the cable from the negative terminal, then take out the screws and bodyside trim panel grille and if necessary the speaker trim to get to the screws. Last of all, pop off the speaker and grille assembly, unplug the wiring connector and installation is the reverse of removal for all the parts.
    Posted by FordPartsGiant Specialist
    Q:
    How to remove and install AM, AM/FM stereo radios, and speakers on Ford Bronco? Posted by Customer
    A:
    To DO away with an AM or AM/FM stereo radio from early models, it is necessary to turn off the cable from the negative terminal of the battery, then to take away the knobs, discs and nuts fastened to radio control shafts in case they exist. Next, unbend the instrument panel bezel and delete the rear support bracket screw, if the exist. Pull the radio out of the instrument panel and remove the antenna cable, wire connector(s) and then proceed to remove the radio chassis from the mounting plate. For later models removal is easier but a special radio removal tools that can be obtained from a dealer or automotive radio shops. Remove the negative terminal of the battery, insert the radio puller on the left and right side of the instruction face plate, push the puller in to releases the radio plate clip and pull out the radio. Remove the wiring connectors and the antenna cable at the rear of the radio, if you are replacing it, transfer the rear mounting bracket to the new radio and connect the wiring connectors and the antenna cable. Put back the radio into the instrument panel slot, fasten the rear mounting bracket and connect the lead-negative battery terminal. For front speakers, to have access to them, the instrument panel pad has to be uninstalled, then the speaker wire connector has to be disconnected, the screws holding the speaker to the instrument panel have to be unscrewed and finally the speaker can be removed. For door speakers: unclip the door trim panel, then unscrew the speaker; pull the speaker out of the mounting recess and disconnect the electrical connection. For rear speakers, if not covered above then disconnect the cable from the negative terminal, then take out the screws and bodyside trim panel grille and if necessary the speaker trim to get to the screws. Last of all, pop off the speaker and grille assembly, unplug the wiring connector and installation is the reverse of removal for all the parts.
    Posted by FordPartsGiant Specialist
    Q:
    How do you install the door speakers after removal for the 2001 Ford Ranger? Posted by Customer
    A:
    Installation is the reverse of the removal steps.
    Posted by FordPartsGiant Specialist
    Q:
    How do you install the radio or CD player after removal for the 1990 Ford Thunderbird? Posted by Customer
    A:
    Plug in the electrical connectors and slide the radio or CD player along the track into the instrument panel until the clips snap in place.
    Posted by FordPartsGiant Specialist
    See expert answers on similar Car Speakers
    Q:
    How do you remove door mounted speakers for the 1997 Lincoln Town Car? Posted by Customer
    A:
    Remove the door trim panel, remove the mounting screws, withdraw the speaker, disconnect the electrical connector, and remove the speaker from the vehicle.
    Posted by FordPartsGiant Specialist
    See expert answers on similar Car Speakers
    Q:
    How do you remove rear quarter panel mounted speakers for the 1985 Lincoln Mark VII? Posted by Customer
    A:
    Remove the screws and pry off the speaker grille, remove the retaining screws, withdraw the speaker, disconnect the electrical connector, and remove the speaker from the vehicle.
    Posted by FordPartsGiant Specialist
    See expert answers on similar Car Speakers
    Q:
    How are the radio receiver and CD player assemblies retained in the instrument panel for the 1990 Mercury Cougar? Posted by Customer
    A:
    They are retained by special clips.
    Posted by FordPartsGiant Specialist
    See expert answers on similar Car Speakers
    Q:
    How do you install the radio/CD player after removal for the 1991 Mercury Grand Marquis? Posted by Customer
    A:
    Installation is the reverse of removal.
    Posted by FordPartsGiant Specialist
    See expert answers on similar Car Speakers
    Q:
    How do you remove body mounted rear speakers on the 1988 Ford Bronco II? Posted by Customer
    A:
    Remove the four speaker mounting screws. Pull the speaker out from the trim panel and disconnect the wire harness plug.
    Posted by FordPartsGiant Specialist
    See expert answers on similar Car Speakers
    Q:
    How do you install the speaker after removal for the 1997 Ford Explorer? Posted by Customer
    A:
    Installation is the reverse of the removal steps.
    Posted by FordPartsGiant Specialist
    See expert answers on similar Car Speakers
    If you have any questions about this product, please don't hesitate to ask us. We will be happy to help you!

Genuine Ford Part E9FZ-18808-A, the Right Choice

To ensure reliability, purchase Ford part # E9FZ-18808-A Speaker Assembly. It is sometimes referred to as Mercury Car Speakers. In terms of quality and longevity, OEM parts are top-tier. This is because they are made according to Ford's demanding factory specifications and go through strict quality control. This part fits specific Mercury Cougar, Lynx, Tracer models.

FordPartsGiant.com is a leading supplier of genuine Ford parts and accessories such as Ford E9FZ18808A Speaker Assembly. On our platform, we provide genuine Ford parts at incredible prices while ensuring top-tier quality. Feel at ease shopping with us, knowing our parts have a hassle-free return policy and rapid delivery service. For detailed Mercury parts information, click here.

Why choose Ford Parts Giant

  • Dedicated Service

    Your complete satisfaction is our #1 goal

  • Lowest Prices

    Best deals on genuine OE parts from dealerships

  • Fast Delivery

    Orders are processed and delivered promptly